Fiber & CO2 Laser Engraving
Laser Cutting & Engraving
Hands-on work with fiber and CO2 lasers, starting from setting up engraving parameters on metal and wooden materials in the test grids through to creating completed engraved artwork.
Calibration — Before / After
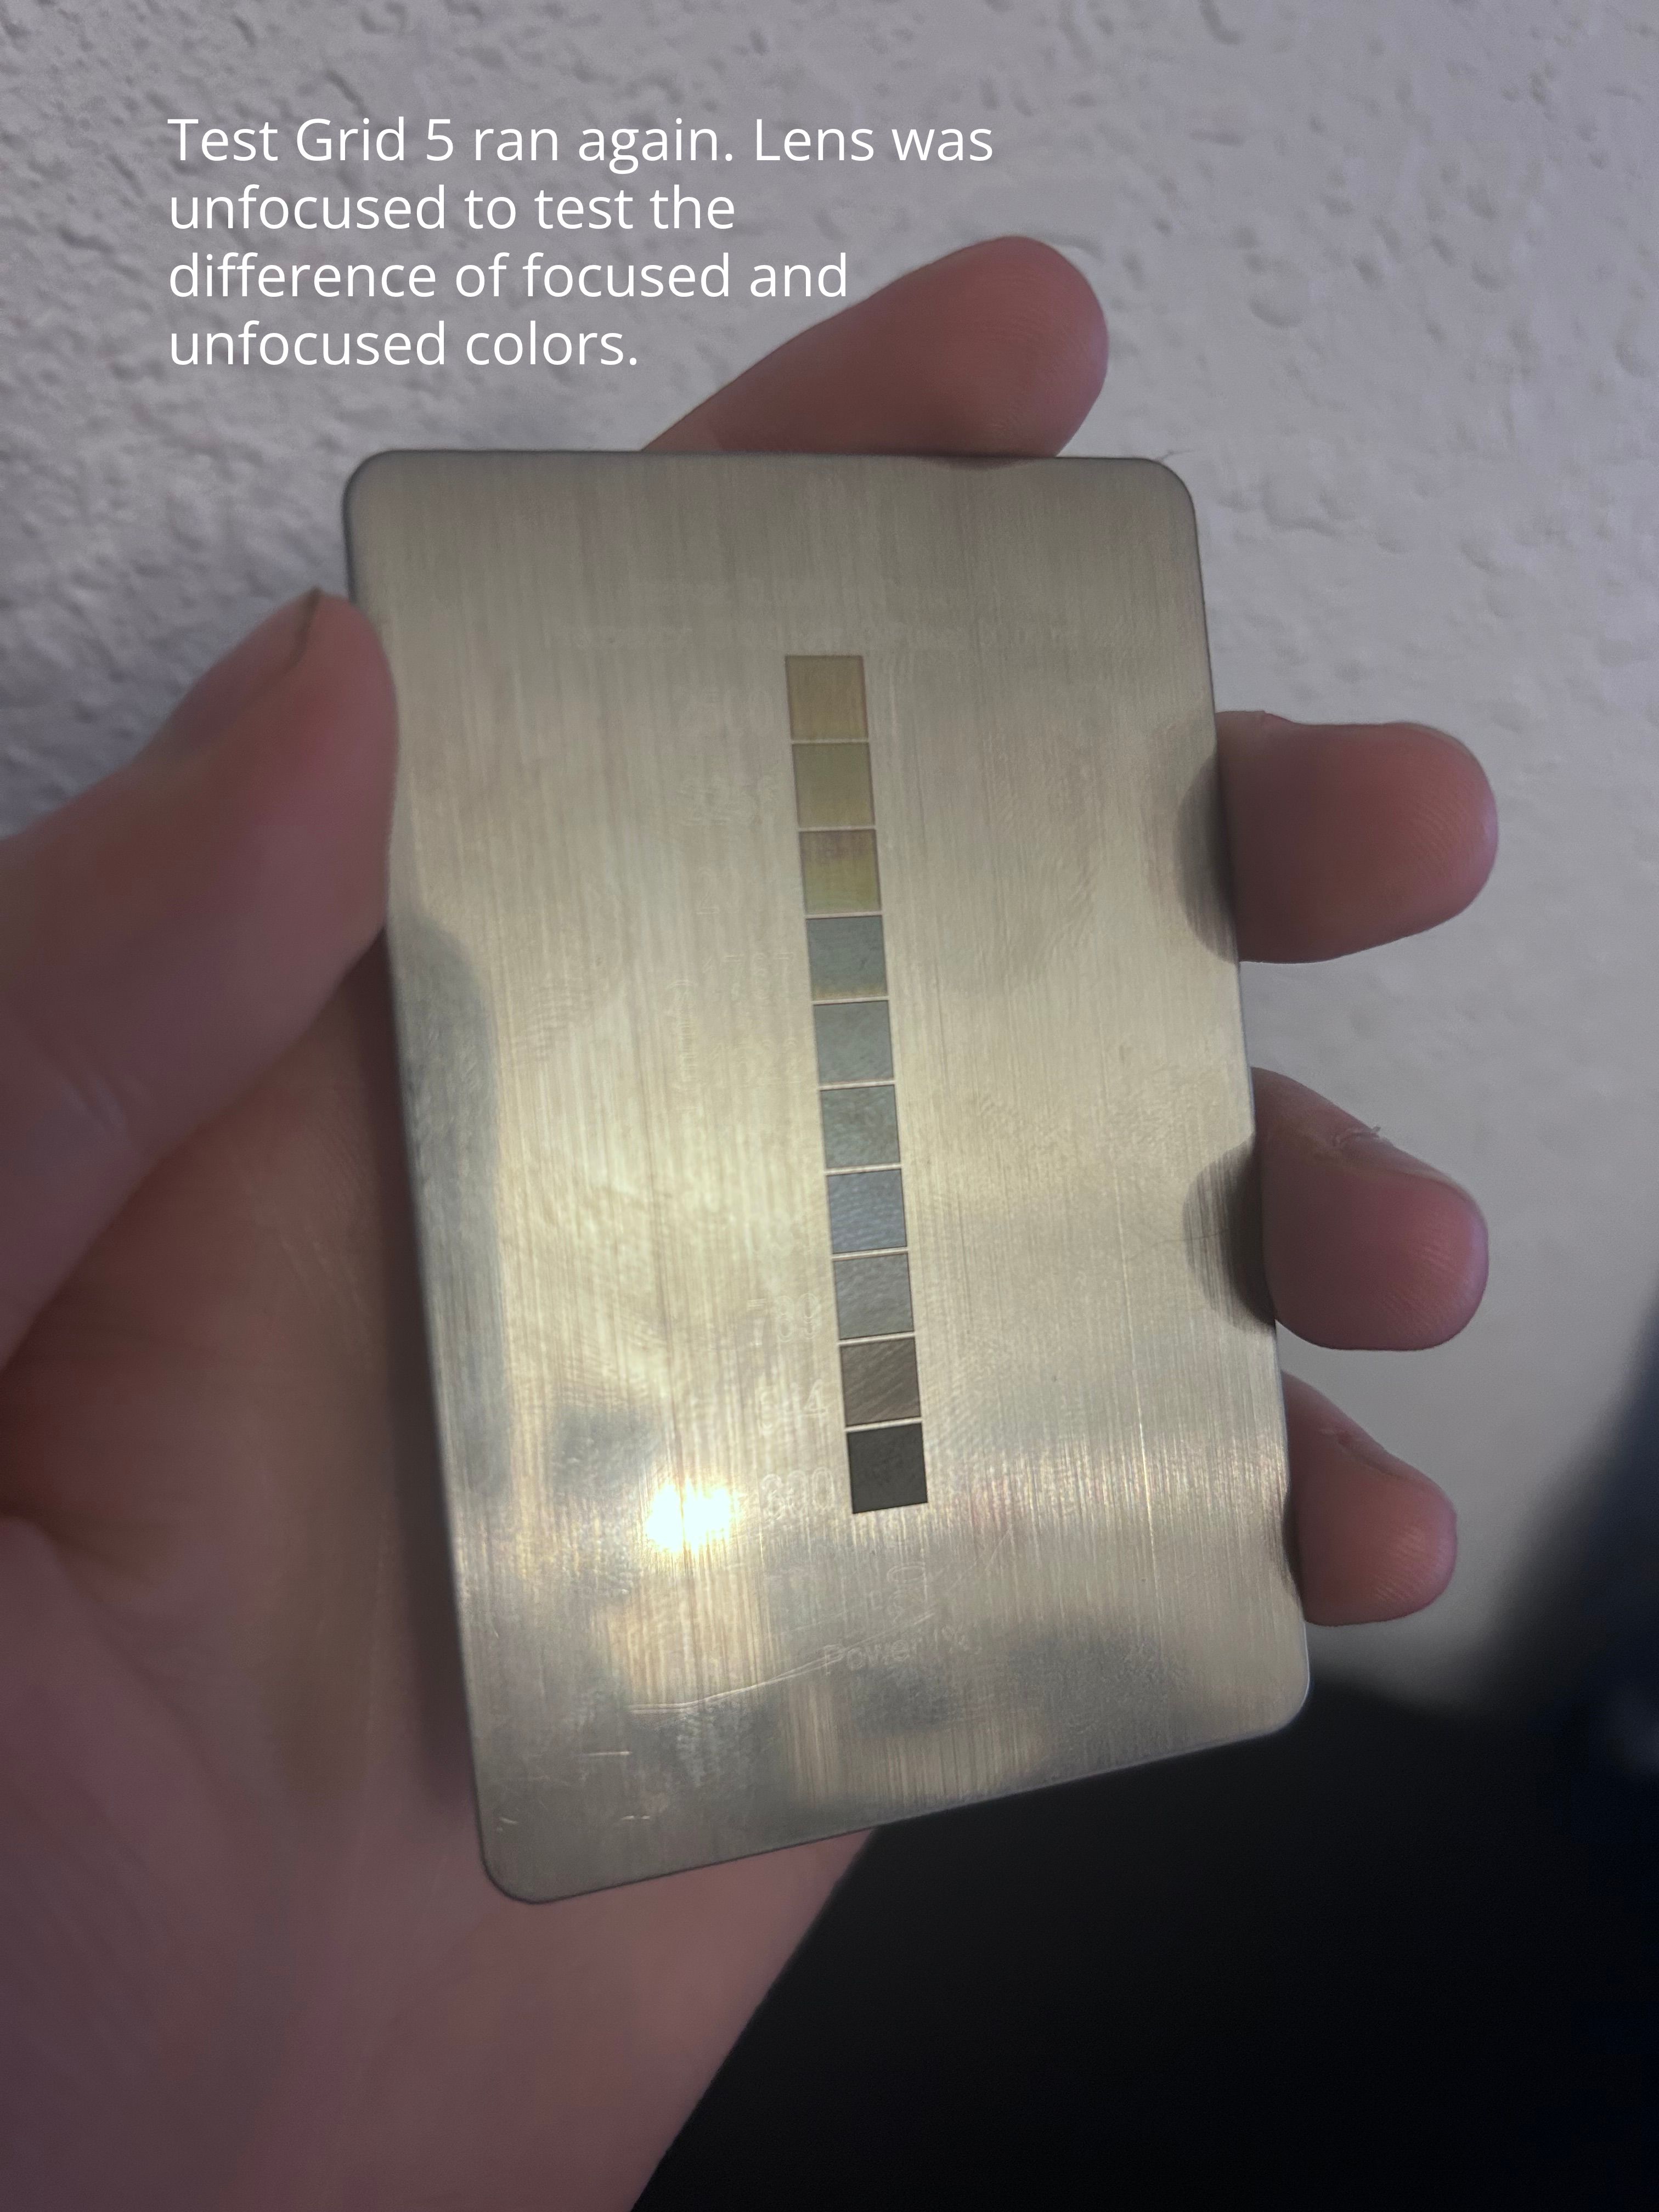
Unfocused
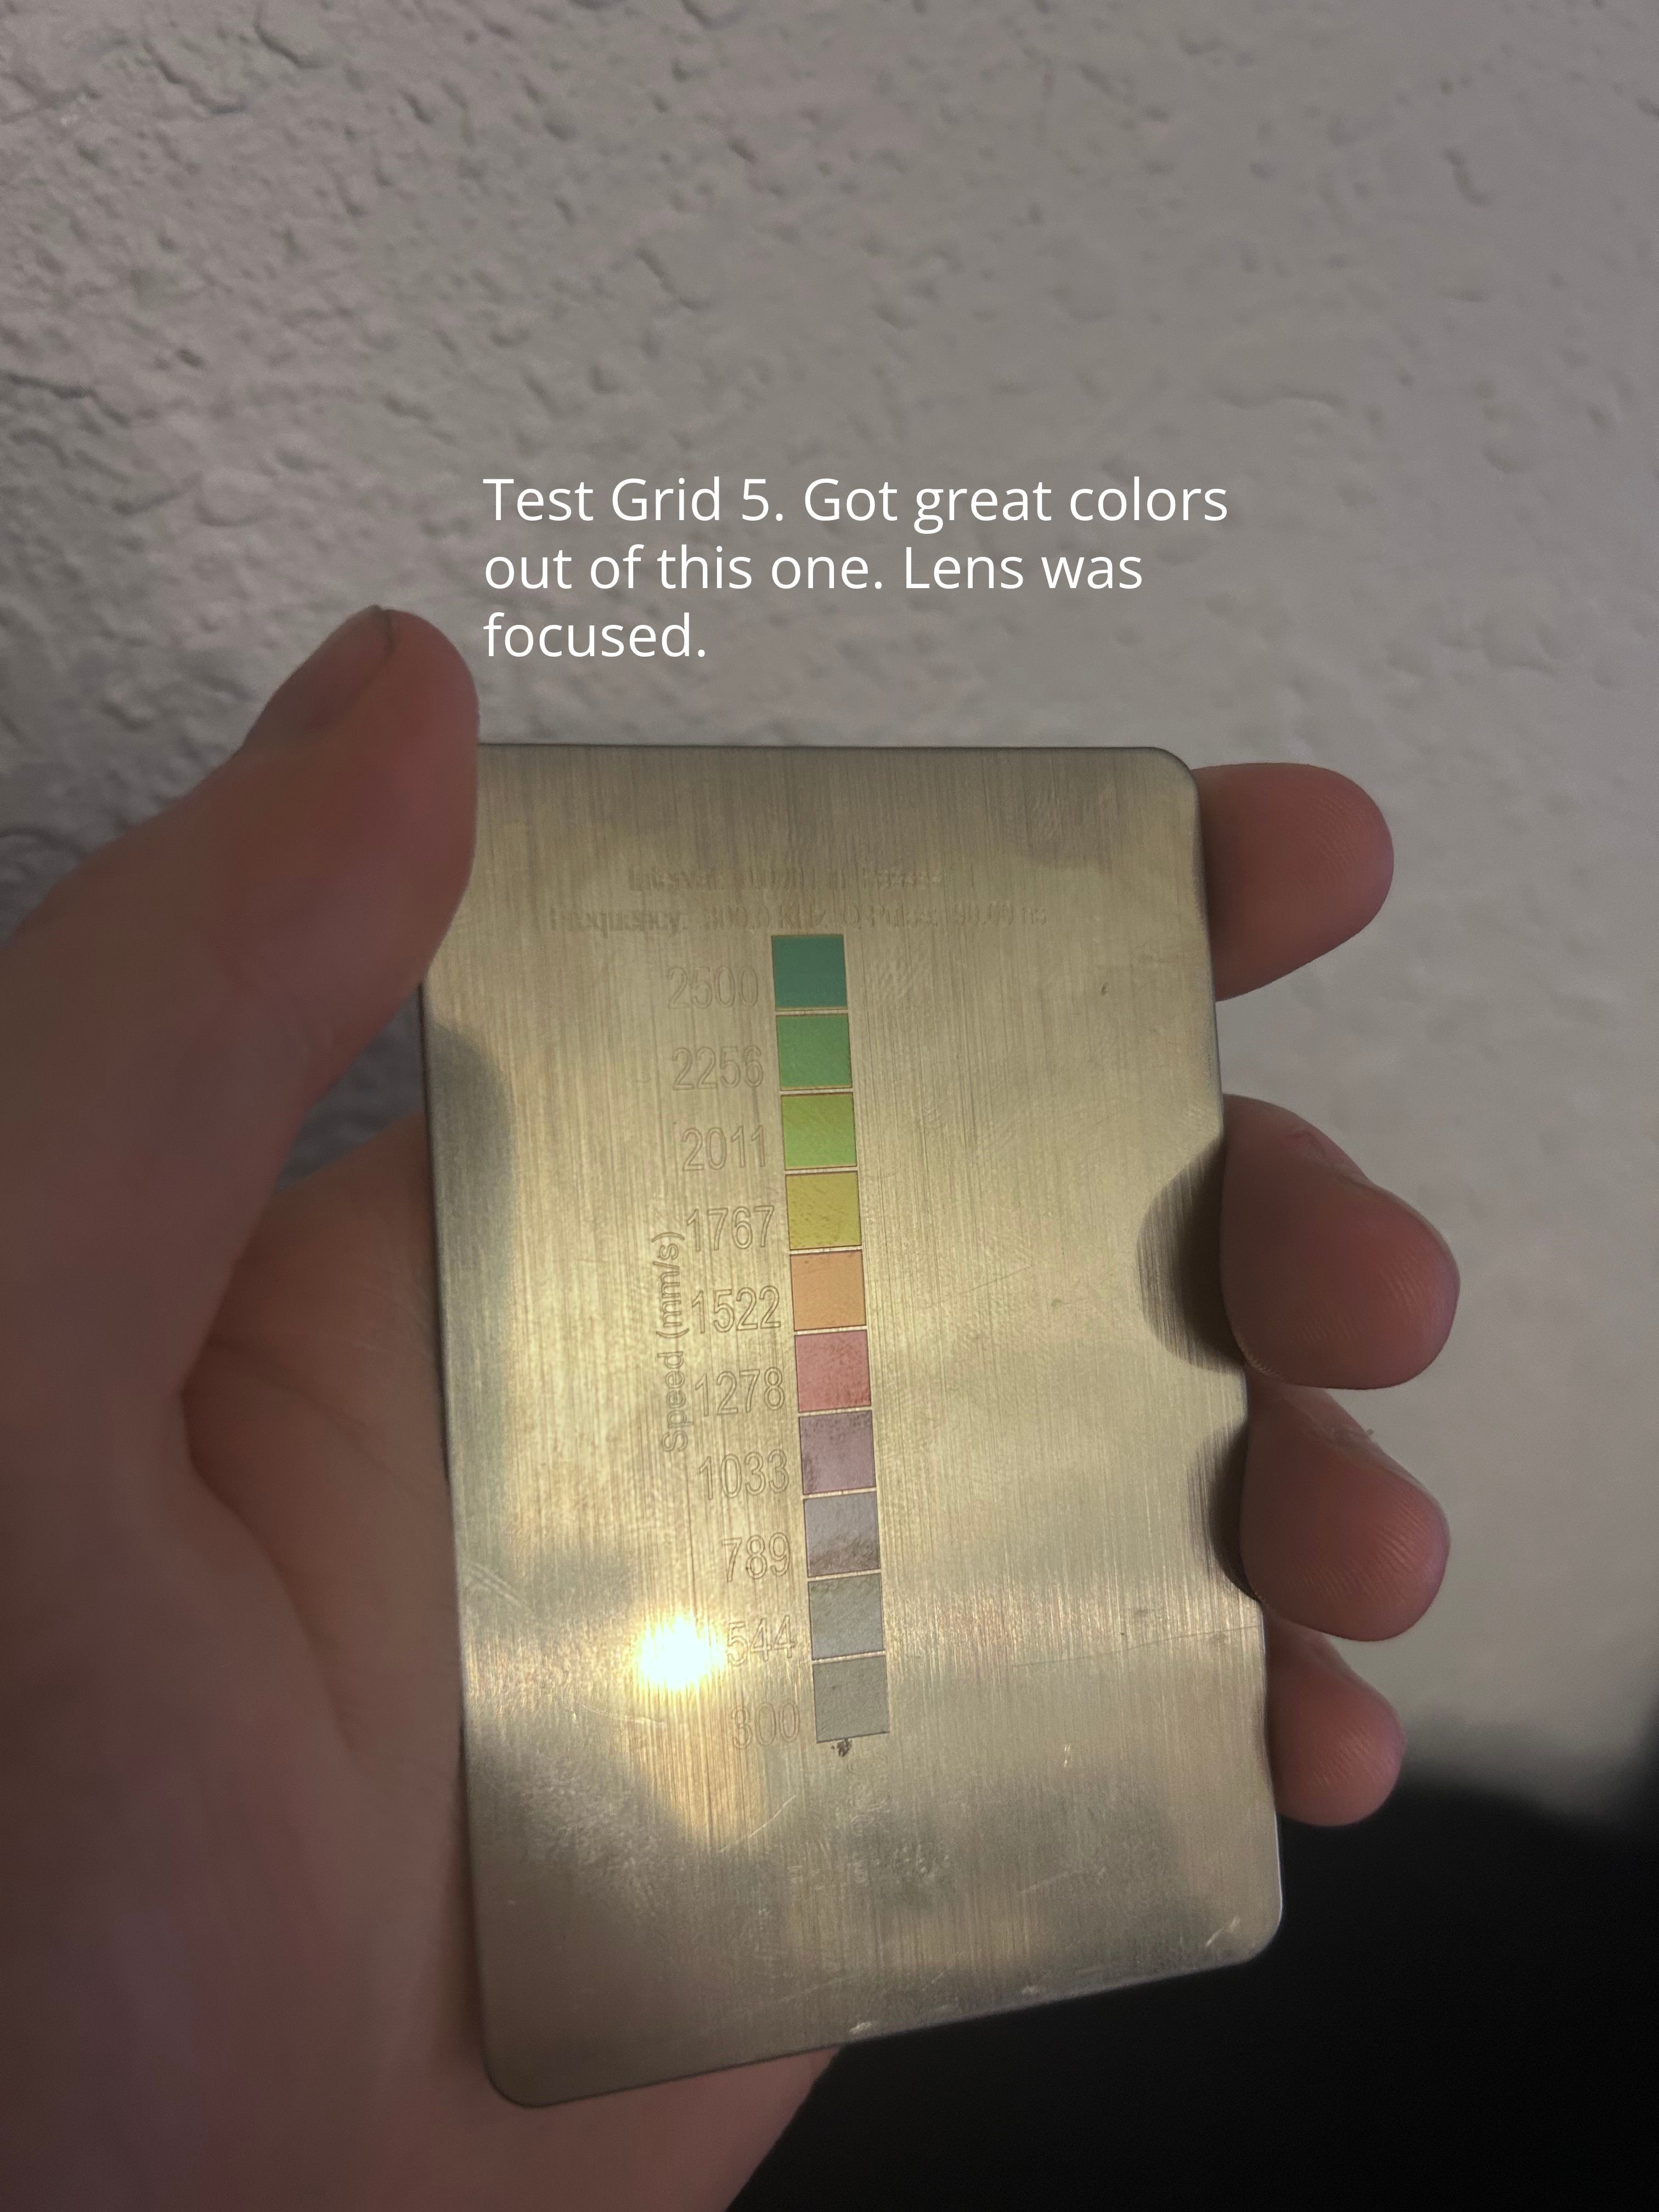
Focused
Test Log
> Entry 01 — Focus Calibration
Setting up parameters for fiber laser on stainless steel involved performing a test grid using a color gradient on a series of speeds and power levels; the coloring process on stainless steel varies with heat applied to the material, which makes small variations in the speed and focus to yield significantly different effects. The first attempt at trying to get consistent red ended up in the grid being nearly completely faded white, which proved to be due to the fact that the lens was out of focus. The subsequent tests performed with the lens in focus yielded a clean color gradient from green to purple and gray.
> Entry 02 — Applied to Finished Pieces
The practice items created were an engraving of a cartoon character on stainless steel and an engraving of a piece of plywood with a combination of a video game character my name.
Settings Reference
Results
Verified PerformanceFocus Calibration
Focused lens determined as the key variable determining the color accuracy on stainless steel, following an unsuccessful first test, where an out-of-focus attempt yielded very little color differentiation on the grid.
Speed & Power Mapping
Developed a reference grid linking engraving speed to annealed colors that could be used as a look-up table in future work using the same material.
Finished Pieces
Applied calibrated settings to produce clean finished work on both metal (fiber) and plywood (CO2), combining engraving, cutting, and text in single-pass designs.
Reflection
"Calibrated settings were used to get high quality results for fiber laser on metal and CO2 laser on plywood, which incorporated engraving, cutting and text in one pass."
Skills Learned